2/6/14

Principles of asepsis

Asepsis means freedom from pathogenic (that is, disease-causing) microorganisms, whilst sepsis indicates the presence of micro-organisms causing toxicity in the body. Infection can occur endogenously or exogenously.

Endogenous – from sites on or in the host, for example from the client’s skin, nose, or intestines
Exogenous – from routes outside the host or environmental, such as:
– airborne, for example droplets, dust, dressings, bedding
– direct or indirect contact, for example hands, clothing, equipment, and food
– percutaneously, for example intravenous infusions, needles.

In order to reduce the potential for exogenous infection, nurses and other health care professionals employ what is termed a sterile (or aseptic), nontouch technique when undertaking invasive procedures such as urethral catheterization and injections, or procedures where the risk of crossinfection is high, for example when dressing wounds or removing sutures and drains. The basic principles of this technique are outlined below.
Read More

12/30/13

Obtaining a Wound Culture by Swab

Obtaining a Wound Culture by Swab

Equipment
■ 3 pairs of clean procedure gloves.
■ Culturette tube.
■ Sterile 4 in. x 4 in. gauze pad in an impermeable tray or separate 4 x 4 packs and an impermeable barrier.
■ Sterile 0.9% (normal) saline solution for irrigation, warmed to body temperature.
■ 35-mL syringe.
■ 19-gauge angiocatheter.
■ Gown and face shield.
■ Emesis basin.
■ Water-resistant disposable drapes.

Assessment
■ If the wound is covered when you begin, you will make these assessments when you remove the soiled dressing and after cleansing the wound:
■ Assess for pain.
■ Determine whether the wound requires sterile, modified sterile, or clean technique.
■ Assess:
• Amount and type of tissue present in the wound bed.
• Type and amount of exudate.
• Wound for odor.
• Tissue surrounding the wound edge.

Post-Procedure Reassessment
■ Assess patient’s pain level and medicate according to prescriptions.
■ Monitor lab reports for results of the swab culture.

Key Points
■ Be Smart! Position the patient for easy access to the wound and in a manner that will allow the irrigation solution to flow freely from the wound with the assistance of gravity.
■ Be Safe! Don protective equipment: gown, face shield, and clean procedure gloves.
■ Remove the soiled dressing and dispose of gloves and dressing.
■ Don clean gloves, and fill a 35-mL syringe with attached 19-gauge angiocatheter with 0.9% (normal) saline solution.
■ Holding the angiocatheter tip 2 cm (3/4 to 1 in.) from the wound bed, gently irrigate the wound (superior to inferior).
■ Press the culture swab against an area of red granulating tissue, and rotate.
■ Reinsert the swab into the culturette tube, label the tube, and transport it to the lab.

Documentation
■ Chart:
■ Appearance and location of the wound and surrounding tissue, noting the type, consistency, and amount of exudate, and odor.
■ Patient’s pain level before the culture. (If the patient was medicated for pain, document the drug and dose used, time given, and patient response.)
■ Method by which the wound was cleansed before the culture.
■ Description of the area where the culture was obtained.
■ Dressing reapplied to wound, if applicable.
■ Education provided to the patient.

Collecting a wound culture by swab
Read More

Procedure of Assisting With Ambulation

Procedure of Assisting With Ambulation

Equipment
■ Nonlatex gloves, if you may be exposed to body fluids.
■ Transfer belt.

Assessment
■ Assess:
■ Level of consciousness, ability to follow directions, and ability to assist with ambulation.
■ Physical size of the patient and your own ability to move the patient.
■ Factors that may increase the risk of falls (elderly, muscle strength, chronic disease, gait disturbance).
■ Any restrictions in movement or position.
■ Patient’s level of comfort.
■ Presence of equipment such as IV lines, drains, or catheters.
■ Possible side effects of medications (e.g., dizziness and sedation).
■ VS (monitor for postural hypotension).

Post-Procedure Reassessment
■ Assess:
■ Level of patient participation in the transfer.
■ Patient’s comfort with ambulation.
■ Posture and base of support.
■ VS for postural hypotension.

Key Points
■ Have the patient wear nonskid footwear.
■ Be Safe! Place the bed in low position, and lock the wheels.
■ Assist the patient to dangle at the side of the bed; assess the patient’s tolerance before beginning ambulation.
■ If two nurses are available to assist with the transfer, one nurse should be on each side of the patient.
■ Be Safe! Brace your feet and knees against the patient. Bend your hips and knees, and hold onto the transfer belt. Pay attention to any known weakness.
■ Instruct the patient to place her arms around you between your shoulders and waist (the location depends on the height of the patient and the nurses). Ask the patient to stand as you move to an upright position by straightening your legs and hips.
■ Allow the patient to steady herself for a moment.
■ One nurse: Stand at the patient’s side, placing both hands on the transfer belt. If the patient has weakness on one side, position yourself on the weaker side.
■ Two nurses: One nurse is on each side of the patient, grasping the transfer belt.
■ Slowly guide the patient forward. Observe for signs of fatigue or dizziness.
■ Be Safe! If the patient has an IV pole, allow the patient to hold onto the pole on the side where you are standing but not to use it for full support. Assist the patient to advance the pole as you ambulate together.

Documentation
■ Record:
■ The amount of assistance required.
■ Any problems with ambulation.
■ The distance walked.

Stand at the patient's side, placing both hands on the transfer belt
Assist the patient to advance the IV pole as he ambulates
Read More

Transferring a Patient From Bed to Chair

Transferring a Patient From Bed to Chair

Equipment
■ Nonlatex gloves, if you may be exposed to body fluids.
■ Transfer roller sheet.
■ Transfer board.
■ Gait transfer belt.

Assessment
■ Assess:
■ Level of consciousness, ability to follow directions, and ability to assist with the move.
■ Patient’s physical size and your own ability to move her.
■ Restrictions in movement or position.
■ Patient’s level of comfort.
■ Presence of equipment such as IV lines, drains, or catheters.
■ Possible side effects of medications (e.g., dizziness and sedation).
■ VS.
■ Monitor for postural hypotension.
■ Before transferring a patient to a chair, assess her tolerance of dangling.

Post-Procedure Reassessment
■ Level of patient participation in the transfer.
■ Comfort level during the transfer and in the new position.
■ Proper body position and alignment after position change.
■ VS for postural hypotension.

Key Points
■ Be Safe! Instruct the patient to wear nonskid footwear (slippers or shoes).
■ Place the bed in the low position, and lock the wheels.
■ Assist the patient to dangle at the side of the bed.
■ Brace your feet and knees against the patient. Bend your hips and knees, and hold onto the transfer belt.
■ If two nurses are available to assist with the transfer, one nurse should be on each side of the patient.
■ Be Smart! Instruct the patient to place her arms around you between your shoulders and waist. (The location depends on the height of the patient and the nurses.) Ask the patient to stand as you move to an upright position by straightening your legs and hips.
■ Instruct the patient to pivot and turn with you toward the chair.
■ Ask the patient to flex her hips and knees as she lowers herself to the chair. Guide her motion while maintaining a firm hold on her.
■ Be Safe! If the chair is a wheelchair, lock the wheels.

Documentation
■ Moving patients to a chair is a routine aspect of care and may not be documented.
■ For nursing notes, document:
■ How much assistance was required.
■ Use of assistive devices.
■ Any problems with positioning the patient.
■ How long the patient was out of bed.
■ How the patient tolerated the activity.

Transferring a patient from bed to chair by bracing feet and kneesagainst the patient
Transferring a patient from bed to chair using a transfer belt
Read More

Dangling a Patient at the Side of the Bed

Dangling a Patient at the Side of the Bed

Equipment
■ Nonlatex gloves, if you may be exposed to body fluids.
■ Transfer roller sheet or transfer board, if needed.
■ Gait transfer belt.

Assessment
■ Assess:
■ Level of consciousness, ability to follow directions, and ability to assist with the move.
■ The patient’s physical size and your own ability to move him.
■ Restrictions in movement or position.
■ Patient’s level of comfort; presence of equipment such as IV lines, drains, or catheters; possible side effects of medications (e.g., dizziness and sedation).
■ VS.
■ Monitor for postural hypotension.
■ Before transferring a patient to a chair, assess his tolerance of dangling.

Post-Procedure Reassessment
■ Assess:
■ Level of patient participation in the transfer.
■ Comfort level during the transfer and in the new position.
■ Proper body position and alignment after position change.
■ VS for postural hypotension.

Key Points
■ Place the patient supine, and raise the head of the bed to 90°.
■ Be Safe! Apply a gait transfer belt, and put the bed in the low position with wheels locked.
■ Stand facing the patient with a wide base of support. Place your foot closest to the head of the bed forward of the other foot.
■ Position your hands on each side of the gait transfer belt.
■ Rock onto your back foot as you move the patient into a sitting position; pivot to bring the patient’s legs over the side of the bed.
■ Be Smart! Stay with the patient as he dangles.

Documentation
■ For nursing notes, document:
■ How much assistance was required.
■ Use of assistive devices.
■ Any problems with positioning the patient.
■ How long the patient was dangling.
■ How the patient tolerated the activity.

Using proper body mechanics for dangling a patient at the side of the bed
Pivoting the patient’s legs to a dangle position
Read More

Procedure of Logrolling a Patient

Procedure of Logrolling a Patient

Equipment
■ Nonlatex gloves, if you may be exposed to body fluids.
■ Friction-reducing device, such as a transfer roller sheet or scoot sheet.
■ Pull or lift (draw) sheet; pillows, as needed.

Assessment
■ Assess:
■ Level of consciousness, ability to follow directions, and ability to assist with the move.
■ Any restrictions in movement or position.
■ Level of comfort.
■ Physical size of the patient.
■ Assistive devices available.
■ Presence of equipment such as IV setups, pumps, or casts.

Post-Procedure Reassessment
■ Assess the patient’s comfort level, body position and alignment, and skin for pressure areas.

Key Points
■ Move the patient as a unit to the opposite side of the bed; raise the siderail on that side.
■ Be Smart! Move to the side of the bed that the patient will be turning toward; lower the siderail.
■ Be Safe! Each staff member evenly distributes his arms across the patient’s length. One nurse is responsible for moving the head and neck as a unit.
■ Shift your weight backward as you roll the patient toward you.

Documentation
■ Repositioning is not usually charted every time it is done; often it is recorded on a flowsheet.
■ Document in the nursing notes any problems with the procedure or any areas of skin breakdown.
■ You might also document turning as an intervention when charting toa specific problem. For example, for Impaired Skin Integrity, you might chart, “Position changed hourly.”

Logrolling a patient using a transfer roller sheet
Logrolling a patient using proper body mechanics
Read More

Moving a Patient Up in Bed

Moving a Patient Up in Bed

Equipment
■ Nonlatex gloves, if you may be exposed to body fluids.
■ Friction-reducing device, such as a transfer roller sheet or scoot sheet.
■ Pull or lift (draw) sheet; pillows, as needed.

Assessment
■ Assess:
■ Level of consciousness, ability to follow directions, and ability to assist with the move.
■ Any restrictions in movement or position.
■ Level of comfort, physical size, and assistive devices available.
■ Equipment in use, such as IV setups, pumps, or casts.

Post-Procedure Reassessment
■ Assess:
■ Patient’s comfort level.
■ Body position and alignment.
■ Skin for pressure areas.

Key Points
■ Be Safe! Use a friction-reducing device to move the patient if the patient can assist with movement. Use a full body sling if the patient cannot assist.
■ Remove the pillow. Have the patient flex her neck, fold her arms across her chest, and place her feet flat on bed.
■ Position a nurse on either side of the patient.
■ Be Smart! Use a wide base of support.
■ Have the patient, on the count of 3, push off with her heels as you shift your weight forward.

Documentation
■ Repositioning is not usually charted every time it is done; often it is recorded on a flowsheet.
■ Document any problems with repositioning the patient or any areas of skin breakdown.
■ You might also document turning as an intervention when charting to a specific problem. For example, for Impaired Skin Integrity, you might chart, “Position changed hourly.

Move a patient up in bed using a trapeze
Move a patient up in bed using a mechanical device
Use a drawsheet to turn the patient to one side of the bed
Read More

Inserting an Indwelling Fecal Drainage Device

Inserting an Indwelling Fecal Drainage Device

Equipment
■ Fecal device kit: contains soft silicone catheter tube, a syringe, and a collection bag.
■ Water-soluble lubricant.
■ Approximately 100-mL container of tap water or saline (per manufacturer’s directions).
■ 500 mL of lukewarm irrigant (water or saline).
■ 60-mL Luer-Lok syringe and a catheter-tip syringe (if not contained in the kit); protective skin-care dressing (e.g., Stomahesive).
■ Tape, scissors, linen-saver pad.
■ pH-balanced soap and water or recommended skin cleanser.
■ Procedure gloves, mask, and goggles.
■ Be Safe! Internal fecal catheters are not approved for children.

Assessment
■ Assess recent bowel pattern. If no bowel movement for 2 or more days, the patient will likely need a bowel prep or enema before the procedure.
■ Also check that a primary care provider has performed a digital rectal exam.
■ Be Smart! The treatment plan may need to be changed if you discover the following:
■ Presence of any indwelling anal or rectal device (e.g., thermometer for continuous temperature monitoring).
■ Suppositories or enemas are a part of the current treatment plan. Collaborate with the primary provider, as needed.
■ Be Safe! If the patient has a history of bowel disorders within the last 12 months (e.g., proctitis, recent rectal surgery; rectal injury or tumor; large and or inflamed hemorrhoids), contact the primary care provider immediately; an internal fecal catheter is contraindicated.

Post-Procedure Reassessment
■ Be Safe! Identify factors that increase the risk for bleeding, including anticoagulant and/or antiplatelet therapy and certain lab results (PT, PTT, platelets). These require careful patient monitoring.
■ Be Safe! Internal fecal devices are not intended for use longer than 29 days.
■ Be Safe! Monitor for rectal bleeding. It may indicate tissue necrosis, bowel perforation, or fistula formation; device must be removed.

Key Points
■ Obtain assistance as needed.
■ Don PPE.
■ Place the patient left side-lying and remove any indwelling device.
■ Cleanse and dry perineal area; clip hair as needed.
■ Prepare the device according to instructions (e.g., remove residual air from the balloon).
■ Connect the catheter to the collection bag. Clamp and hang the bag lower than the level of the patient.
■ Lubricate the balloon end of the catheter generously with watersoluble lubricant.
■ Spread buttocks and gently insert the balloon end of the catheter.
■ Inflate the retention cuff with water or saline.
■ Remove the syringe from the inflation port; gently tug the catheter.
■ Be Safe! If you used an introducer to insert the catheter, be sure to now completely aspirate the air from it.
■ If the device has anchoring straps, apply protective skin care dressing and tape one strap to each of the patient’s buttocks.
■ Position the tubing, avoiding kinks; position the collection bag lower than patient.

Documentation
■ Chart:
■ Date, time, and type of collection device used.
■ Your assessment of the perineal skin.
■ Patient’s tolerance of the procedure.
■ Characteristics and amount of stool in the collection bag (output).
■ Patient/family teaching.
Read More

Applying an External Fecal Collection System

Applying an External Fecal Collection System

Equipment
■ pH-balanced soap and water or recommended skin cleanser.
■ Skin protection wipes (e.g., peristomal wipes to protect skin and improve adherence).
■ Self-adhesive fecal containment device.
■ Procedure gloves.
■ Linen-saver pad.
■ Scissors.

Assessment
■ Assess bowel patterns (fecal diversion is indicated when the patient is incontinent of liquid or semiliquid stools).
■ Be Safe! Assess for contraindications to the use of an external fecal collection device; allergies/sensitivities to silicone or any of the materials in the device; impaired perirectal skin integrity.

Post-Procedure Reassessment
■ Assess how well the patient tolerated the procedure.
■ Note the color, consistency, and odor of stool.
■ Monitor for abdominal distention and pain.
■ Regularly assess that connections are secure and that the device is not leaking.
■ Monitor the amount of stool in the collection bag.
■ Be Smart! Change the collection bag when it is about 2/3 full.

Key Points
■ Select the fecal management system appropriate for the patient.
■ Obtain assistance as needed.
■ Place the patient side-lying.
■ Don procedure gloves.
■ Cleanse and dry perineal area; clip hair as needed.
■ Spread the buttocks and apply the device; avoid gaps and creases.
■ Connect the pouch to a drainage bag; hang lower than the patient.

Documentation
■ Record:
■ Date, time, and type of collection device used.
■ Assessment of the perineal skin.
■ Patient’s tolerance of the procedure.
■ Characteristics and amount of stool in the collection bag (output).
■ Patient/family teaching.
Read More

Procedure of Irrigating a Colostomy

Procedure of Irrigating a Colostomy

Equipment
■ Irrigation equipment:
■ One-piece system with a fluid container connected to tubing with cone; or two-piece system with a container separate from tubing and cone.
■ Irrigation sleeve; a sleeve without adhesive backing also requires a belt to hold it in place.
■ Clamp for a sleeve with an opening at the top.
■ Prescribed irrigating solution (usually 500 to 1,000 mL warm tap water, 100° to 105°F (37.8° to 40.6°C).
■ IV pole or other equipment to hang the irrigation container.
■ Chair.
■ Water-soluble lubricant.
■ Silicone-based adhesive remover.
■ Skin cleansers and barriers as recommended by your agency.
■ Toilet tissue.
■ Washcloth, towel.
■ Waterproof pad.
■ 2 pairs of procedure gloves.
■ Toilet facilities that include a flushable toilet and a hook or other device to hold the irrigation container (or bedpan or bedside commode for patients with impaired mobility).
■ New ostomy appliance and skin barrier or stoma cap cover.
■ Ostomy deodorant (optional).
■ Plastic bag for disposal of the used pouch.

Assessment
■ Assess cognitive level and mobility status.
■ Assess the patient’s ability to maintain a sitting position.
■ Evaluate the defecation pattern, nature of stool, hydration status, placement of stoma, characterics of the stoma, abdominal distention, and nutritional pattern. Assess the type of ostomy.
■ Be Safe! Do not irrigate an ileostomy.

Post-Procedure Reassessment
■ Observe:
■ Characteristics of the stool (color, amount, consistency).
■ Signs of bleeding from stoma or bowel.
■ Presence or absence of abdominal distention.
■ Patient’s tolerance of procedure (e.g., cramps, fatigue).
■ Patient’s ability to participate in the irrigation.

Key Points
■ Be Safe! Consult with the ostomy nurse and/or physician to see if colostomy irrigation is appropriate for your patient.
■ Determine the patient’s normal bowel pattern before surgery.
■ Prime the tubing before irrigation, using 500 to 1,000 mL, preferably 1,000 mL, of warm tap water.
■ Hang the solution about 45 cm (18 in.) above the stoma height.
■ Be Smart! Position the patient in front of or on the toilet or bedside commode. If the patient is immobile, place her in left side-lying (Sims’) position, and use a bedpan.
■ Prepare the new appliance before removing the existing one.
■ Don procedure gloves.
■ Examine the stoma and periostomal skin.
■ Apply the irrigation sleeve.
■ Lubricate the cone at the end of the tubing and insert it gently.
■ Open the tubing clamp and let the solution flow slowly for about 10 to 15 minutes. Then clamp the tubing and remove the cone.
■ Close the top of the irrigation sleeve with a clamp, have patient remain sitting, and allow approximately 30 minutes for evacuation.
■ Remove the sleeve, and rinse, dry, and store it.
■ Cleanse the stoma and peristomal skin with a warm washcloth.

Documentation
■ Document:
■ Your assessment of the stoma and peristomal area.
■ The amount of irrigation solution used.
■ The date and time you performed the irrigation.
■ Characteristics of the stool returned in the irrigation fluid.
■ Patient teaching.

The end of the irrigation sleeve should not hang down into the water
Read More

Changing an Ostomy Appliance

Changing an Ostomy Appliance

Equipment
■ Skin care items per agency protocol (e.g., pH-balanced skin cleanser, skin prep, skin barrier wipe, adhesive remover, adhesive paste, and stoma paste if needed).
■ Stoma measuring guide (or precut template).
■ Scissors.
■ Pen or pencil.
■ 2 pairs of procedure gloves.
■ Wash cloth, towel, basin with warm water.
■ Toilet tissue.
■ 4 in. 4 in. gauze pad.
■ Bedpan or container for effluent.
■ Plastic bag for disposal of used pouch.
■ Plastic bag for disposal of other contaminated articles.
■ Waterproof pad.
■ Ostomy deodorant.
■ Hypoallergenic paper tape (optional) or ostomy belt.
■ Bath blanket.
■ Ostomy pouch:
■ One-piece pouch with the wafer attached, or a two-piece system with a separate wafer and pouch.
■ Clamp for pouches with an opening at the bottom (you do not need a new clamp each time).

Assessment
■ Determine the changing schedule for the pouch and whether a new clamp is needed.
■ Observe abdominal shape and incision, if present. Auscultate for bowel sounds.
■ Assess the type of stoma (e.g., ileostomy, colostomy, urostomy), number of stomas, and location on the abdomen to determine the type of pouch to use.
■ Assess stoma color, shape, size, and/or length of protrusion or retraction; stoma construction (end, loop, double barrel); direction of stoma lumen; and discharge.
■ Be Smart! The stoma should be moist and red or pink. Alterations in color (purple, black, or blue) may indicate poor circulation and necrosis and should be reported to the primary provider.
■ Assess peristomal skin for redness, rash, irritation, or excoriation. Observe the existing skin barrier and pouch for leakage and length of time in place. You may have to remove the pouch to observe the stoma fully.
■ Be Smart! Notify the primary care provider or an ostomy specialist immediately if you note peristomal skin abnormalities.
■ Measure the stoma with each pouching system. Follow the manufacturer’s directions and measuring guide for the size of ostomy pouch and the patient’s stoma size.

Post-Procedure Reassessment
■ Observe:
■ Characteristics of stoma: color, size, presence of edema, and shape.
■ Presence of blisters, redness, or excoriation on peristomal skin.
■ Amount and characteristics of effluent: color, odor, consistency.
■ Whether the patient expressed a desire to participate in the task or demonstrated nonverbal cues that she is ready to learn about the task (e.g., looking at the stoma).
■ The patient’s condition and self-care ability (consider vision, dexterity or mobility, and cognitive ability).

Key Points
■ Be Smart! Change the pouch every 3 to 5 days, as a general rule.
■ Empty the old pouch before removing it, if possible.
■ Remove the wafer or pouch, pulling down from the top with one hand while holding countertension with the other.
■ Assess the stoma and the peristomal skin area (e.g., for discoloration, swelling, redness, irritation, excoriation, bleeding).
■ Use a measuring guide to determine the size of the stoma.
■ Trace the size of the opening onto the back of the wafer, and cut the wafer opening about 2 to 3 mm (1/16 to 1/8 in.) larger.
■ Apply the new wafer with gentle pressure.
■ Some pouches come with the wafer attached, some without. These instructions assume that the wafer is attached.

Documentation
■ Document:
■ Your assessment of the stoma and peristomal skin area.
■ Patient’s tolerance of the procedure.
■ Type of appliance used, including the manufacturer and part number.
■ Use of any special ostomy skin care products.
■ Amount of liquid effluent (on the I&O portion of the graphics record).
■ Patient teaching and the degree to which the patient participated in the procedure.

Apply adhesive remover with one hand as you press the skin away fromthe wafer with the other hand
Read More

Removing Stool Digitally

Removing Stool Digitally

Equipment
■ 2 pairs of clean procedure gloves.
■ Water-soluble lubricant (containing lidocaine, if agency policy permits).
■ Bedpan and cover.
■ Washcloth, soap, and towel or toilet tissue (or moistened towelettes).
■ Basin of warm water.
■ Bath blanket.
■ Waterproof pad.

Assessment
■ Assess:
■ Cognitive level and mobility status.
■ History of fecal impaction.
■ Time of last bowel movement.
■ Stool consistency.
■ Desire and ability to defecate.
■ Pain on defecation.
■ Pattern of bowel movements, diet, exercise, mobility status, and medications (e.g., iron supplements or narcotic analgesics).
■ Bowel sounds and abdominal distention.
■ Be Safe! Assess the patient’s baseline VS and history of heart disease. Be sure to monitor the patient’s pulse before and during the procedure; be alert for bradycardia.
■ Be Safe! Assess the patient’s WBC count. If low, discuss this procedure with the primary care provider to evaluate the risks and benefits of the procedure.
■ Be Smart! Determine whether the procedure will be accompanied by suppository insertion or enema administration.

Post-Procedure Reassessment
■ Determine whether evacuation of the retained stool was complete. Perform a rectal exam to assess for presence of stool.
■ Reassess VS, and compare the results to the initial assessment.
■ Continue to monitor for 1 hour for bradycardia.
■ Assess bowel sounds; palpate the abdomen for nontenderness and softness; ask the patient whether he feels relief from rectal pressure and abdominal discomfort.

Key Points
■ Be Smart! Be aware that this procedure is both painful and embarrassing to your patient.
■ Be Safe! Do not delegate this procedure to nursing assistive personnel.
■ Trim and file your fingernails so they do not extend over the ends of your fingertips.
■ Be Smart! You may wish to double-glove for this procedure.
■ Lubricate your gloved finger generously.
■ Use only one or two fingers, and remove stool in small pieces.
■ Allow the patient periods of rest, and monitor for signs of vagal nerve stimulation.
■ Teach the patient lifestyle changes necessary to prevent stool retention.

Documentation
■ Document the bowel movement on the graphic record.
■ Record the procedure and the patient’s tolerance for the procedure, and any unusual characteristics of the stool (e.g., black or green color, blood, or mucus) in the nursing notes.
■ Chart the pulse rate on the VS record.

Gently rotate your finger around and into the mass
Break the stool into smaller pieces
Read More

Administering a Cleansing Enema

Administering a Cleansing Enema

Equipment
■ Washcloths, towels, disposable towelettes and/or toilet tissue.
■ Bath blanket.
■ Waterproof pad.
■ Bedpan with cover or bedside commode, if needed.
■ Water-soluble lubricant.
■ Procedure gloves.
■ IV pole.
■ Enema administration container and solution, or prepackaged enema depending on the type of enema ordered:
■ Enema kit: A package of supplies that includes a small plastic bucket or a 1-liter plastic bag with attached tubing, disposable toweling, lubricant, and castile soap.
■ Prepackaged enema solution:You may need to obtain a prepackaged enema from the pharmacy or central supply department.

Assessment
■ Check for history of bowel disorders (e.g., diverticulitis, ulcerative colitis, recent bowel surgery, abdominal pain, abdominal distention, hemorrhoids) and for increased intracranial pressure, glaucoma, or recent rectal or prostate surgery.
■ Be Smart! Review lab results (especially BUN, creatinine, and electrolytes). Hypertonic, hypotonic, and phosphate enemas have been linked to fluid and electrolyte changes.
■ Inspect the abdomen for distention. Note the patient’s last bowel movement, recent bowel movement pattern, and bowel sounds.
■ Assess cognitive level and mobility status, degree of rectal sphincter control, and for presence of a fecal impaction.


Post-Procedure Reassessment
■ Observe the amount, color, and consistency of the stool.
■ Evaluate the patient’s tolerance of the procedure (e.g., cramping, discomfort).
■ Determine whether subsequent enema administration is required (e.g., a prescription for “enemas until clear”).

Key Points
■ Be Smart! Generously lubricate the rectal tube and insert it gently.
■ Instill warm solution at a slow rate.
■ Be sure patient is properly positioned.
■ Instruct her to retain the solution for 3 to 15 minutes, depending on the type of enema.
■ Assist the patient to a sitting or squatting position to promote defecation.
■ Be Safe! Before leaving the bedside, implement fall prevention measures appropriate for your patient.
■ Be Safe! Use nursing judgment to modify the procedure based on the patient’s mobility and ability to follow instructions.

Documentation
■ Document the type of enema given and, if applicable, the amount of the solution instilled.
■ Document the patient’s tolerance of the procedure and the characteristics and amount of the stool.
■ If the prescription is to administer enemas until the returns are clear, document the color of the returned solution and the amount of stool seen.
■ Be Smart! For prepackaged enemas, some facilities require documentation on the MAR.

Start at the level of the patient’s hips; then raise the container to 12 to18 in. above hip level
Administering a prepackaged enema
Read More

Placing and Removing a Bedpan

Placing and Removing a Bedpan

Equipment
■ Bedpan.
■ 2 pairs of clean gloves.
■ Toilet tissue.
■ 2 washcloths, towel, and basin.
■ Waterproof pad.
■ Bedpan cover.

Assessment
■ Assess level of consciousness, ability to follow directions, and comfort level (especially note the presence of rectal or abdominal pain, hemorrhoids, or perianal irritation).
■ Be Safe! Ask the primary provider to evaluate unexplained pain.
■ Auscultate bowel sounds, and palpate for distention.
■ Assess physical size and mobility; note whether the patient can sit up or lie flat when using a bedpan.
■ Identify factors that necessitate the use of a fracture pan (e.g., fractured pelvis; total hip replacement; lower back surgery; casts, splints, or braces on lower limbs).
■ Review the chart to determine the need to obtain a stool specimen. Post-Procedure Reassessment
■ Assess the amount and characteristics of urine and/or stool.
■ Observe the skin on the perineum and buttocks for redness and breakdown.

Key Points
■ Don clean procedure gloves.
■ Be Smart! Help the patient to achieve a position on the bedpan that will be most helpful in facilitating urinary or bowel elimination. Use semi-Fowler’s position whenever possible. Modify the position based on the patient’s condition.
■ Be Smart! Stabilize the bedpan when removing it.
■ Provide toilet tissue, clean washcloths, and towels for the patient to perform personal hygiene when elimination is complete. Assist if the patient cannot perform these tasks independently.

Documentation
■ Document the amount of urine voided if I&O are being recorded.
■ Record any unusual characteristics of stool or urine in the nursing notes. If there are no unusual characteristics, you will probably document only in the graphic records.

Placing a regular bedpan
Placing a fracture pan
Read More

Continuous Bladder/Catheter Irrigation

Continuous Bladder/Catheter Irrigation

Equipment
■ Three-way (or triple-lumen) indwelling catheter in place.
■ Sterile irrigation solution at room temperature.
■ Connecting tubing.
■ Antiseptic swab.
■ IV pole.
■ Bath blanket.
■ Measuring container.
■ Pair of clean procedure gloves.

Assessment
■ Assess:
■ Characteristics of the urine (e.g., amount, color, odor, presence of clots or mucus).
■ Bladder distention.
■ Patient discomfort.
■ Cognitive status.
■ Check the chart for the amount and type of sterile solution to use and length of time the irrigant is to remain in the bladder.

Post-Procedure Reassessment
■ Note:
■ Flow rate of irrigant and/or inability to instill irrigant into the catheter.
■ Characteristics of the urine (e.g., presence of output, color, amount, clots, mucus).
■ Patient report of discomfort (e.g., pain, spasms).
■ Bladder distention accompanied by lack of urine outflow.
■ Monitor urine output.

Key Points
■ Prepare the irrigation fluid and tubing:
■ Close the clamp on the connecting tubing.
■ Spike the tubing into the irrigation solution port, using aseptic technique.
■ Invert the container, and hang it on the IV pole.
■ Remove the protective cap from the distal end of the connecting tubing.
■ Hold the end of the tubing over a sink or other receptacle.
■ Open the roller clamp slowly, and allow the solution to fill the tubing completely.
■ Recap the tubing.
■ Perform hand hygiene and don clean procedure gloves.
■ Place the patient supine and drape her so that only the connection port on the indwelling catheter is visible.
■ Be Smart! Place a waterproof barrier drape under the irrigation port. If the irrigation kit comes with a sterile drape, use that.
■ Pinch the tubing. Using aseptic technique, connect the end of the irrigation tubing to the side port of the catheter.
■ Before beginning the flow of irrigation solution, empty any urine from the bedside drainage bag, and document the volume on the I&O record.
■ Remove your gloves and wash your hands.
■ Cover the patient, and return her to a position of comfort.
■ Open the roller clamp on the tubing, and regulate the flow of the irrigation solution to meet the desired outcome for the irrigation.

Documentation
■ Document:
■ Date and time of procedure, type of irrigant, and the total volume infused.
■ Characteristics of the urine (e.g., color, odor, clarity, sediment, presence of clots or mucus).
■ Evidence of catheter patency (e.g., flow of urine, absence of distention).

Setup for irrigating the bladder or catheter
Triple lumen irrigation catheter
Read More

Intermittent Bladder/Catheter Irrigation

Intermittent Bladder/Catheter Irrigation

Equipment
Intermittent Irrigation Through a Three-Way Catheter
■ Bag of sterile irrigation solution.
■ Connecting tubing (to connect the bag to the irrigation port).
■ IV pole.
■ Antiseptic swabs.
■ Bath blanket.

Intermittent Irrigation via the Specimen Port Using a Syringe
■ Sterile container.
■ Sterile 60-mL syringe with large-gauge needleless access device.
■ 2 pairs of clean procedure gloves.

Assessment
■ Assess:
■ Characteristics of the urine (e.g., amount, color, odor, presence of clots or mucus).
■ Presence and degree of bladder distention.
■ Discomfort.
■ Cognitive status (to know whether the patient can follow directions and not disrupt the sterile field during the procedure).
■ Determine the amount and type of sterile solution to use.
■ Determine how long the irrigant is to remain in the bladder.

Post-Procedure Reassessment
■ Note:
■ Flow rate of irrigant and/or inability to instill irrigant into the catheter.
■ Characteristics of urine (e.g., presence of output, color, amount, clots, mucus).
■ Patient discomfort (e.g., pain, spasms).
■ Bladder distention accompanied by lack of urine outflow.

Key Points
■ Establish a sterile field under the specimen removal port or the irrigation port on a three-way catheter.
■ Be Safe! Because of the risk of infection, never disconnect the drainage tubing from the catheter.
■ Use a sterile irrigation solution, warmed to room temperature.
■ For intermittent irrigation using a three-way catheter, instill the irrigation solution slowly by gravity drain. The higher you hang the bag, the faster it will infuse in through the catheter.
■ Repeat the process as necessary.

Documentation
■ Chart:
■ Date and time of procedure, type of irrigant, and total volume infused.
■ Characteristics of the urine (e.g., color, odor, clarity, sediment, presence of clots or mucus).
■ Evidence of catheter patency (e.g., flow of urine, absence of distention).

Holding the port above the bladder for irrigation
Read More

Procedure of Removing an Indwelling Catheter

Procedure of Removing an Indwelling Catheter

Equipment
■ Syringe (5 to 30 mL, depending on balloon size).
■ Towel or drape.
■ Towel to use as a receptacle for the catheter.
■ Hygiene supplies (washcloth, warm water, towel).

Assessment
■ Assess:
■ Cognitive level to determine whether the patient will be able to follow instructions.
■ For conditions that may impair the patient’s ability to assume the necessary position.
■ For bladder distention.
■ Assess perineum and meatus (e.g., color, swelling, crusting, drainage, lesions).

Post-Procedure Reassessment
■ Observe the condition of the meatus and the amount and characteristics of the urine; then monitor the next few voidings.
■ Note the time of first voiding and amount voided, and observe the urine for color, amount, odor, and presence of blood.
■ Compare voidings over the next 8 to 10 hours to the patient’s intake.
■ Monitor for bladder distention and signs and symptoms of infection.
■ Be Smart! Place a collection container in the commode if the patient is ambulatory.

Key Points
■ Use clean technique. Wash hands before and after removing the catheter. Wear clean procedure gloves.
■ Be sure to remove the tape securing the catheter to the patient.
■ Obtain a sterile specimen if needed.
■ Deflate the balloon completely by aspirating the fluid.
■ Be Smart! Check the balloon size on the valve port to verify that all fluid has been removed.
■ Be Safe! If you cannot aspirate all the fluid, do not pull on the catheter.

Documentation
■ Record:
■ Date and time the catheter was removed.
■ Amount of urine (on the I&O form).
■ Characteristics of urine (e.g., color, odor, cloudiness, turbidity, or blood).
■ Time the specimen was sent to the lab.
■ Amount of fluid removed from balloon.
■ Urine in drainage bag.
■ Notification of first void.
■ Unusual findings in your assessment of the perineum.
■ How the patient tolerated the procedure.
■ Patient teaching.
Read More

Applying an External (Condom) Catheter

Applying an External (Condom) Catheter

Equipment
■ Condom catheter.
■ 2 pairs of clean procedure gloves.
■ Washcloth and towel.
■ Basin of soap and water.
■ Bath blanket.
■ Urine collection bag (e.g., bedside drainage bag or leg bag).
■ Disposable tape measure.
■ Skin prep (per agency policy).
■ Scissors.
■ Commercial leg strap.

Assessment
■ Assess cognitive level to determine whether the patient will be able to follow instructions; and for conditions that may impair the patient’s ability to assume the necessary position.
■ Be Smart! Assess pattern of voiding to confirm that a condom catheter should be applied. Assess the skin along the shaft of the penis, the glans, and the meatus (for swelling or excoriation). Note whether and how much the penis is retracted toward the body.
■ Be Safe! Assess for neuropathy that affects sensation in the penis and requires more frequent reassessment to prevent Impaired Skin Integrity.

Post-Procedure Reassessment
■ Assess the penis for circulatory changes.
■ Assess:
■ Position and patency of the drainage tubing.
■ Characteristics of the urine (e.g., amount, color, odor, bleeding).
■ Patient comfort.
■ Leakage of urine.
■ Be Safe! Within 30 minutes after condom application, assess that urine flow is not obstructed; and that the penis is not swollen or discolored.

Key Points
■ Clean and dry the penis before catheter application.
■ When applying the condom, stabilize the penis with your nondominant hand.
■ Leave a gap of 2.5 to 5 cm (1 to 2 in.) between the condom and the tip of the penis to prevent skin irritation.
■ Use only the tape supplied in the application kit to secure the catheter.
■ For condom catheters that contain adhesive material on the inside of the condom, grasp the penis and gently compress the condom onto the shaft.
■ Be certain that the tubing from the end of the catheter to the drainage bag is free from kinks.

Documentation
■ Chart date and time of application of the external catheter.
■ Note unusual findings in your assessment of the penis.
■ Document characteristics of urine (e.g., color, odor, consistency, blood).

Unrolling the condom catheter
Securing the drainage tubing to the thigh using a commercial leg strap
Read More

Indwelling Urinary Catheterization

Indwelling Urinary Catheterization

Equipment
■ Washcloth and towel; soap and water.
■ At least 2 pairs of procedure gloves.
■ Bath blanket.
■ Procedure lamp or flashlight.
■ 2% lidocaine gel (according to agency policy and patient need).
■ Catheter insertion kit containing sterile gloves, antiseptic cleansing agent, forceps, cotton balls, sterile waterproof drapes, sterile lubricant, double-lumen or triple-lumen catheter with a balloon tip for inflation instead of a single-lumen rubber catheter.
■ Syringe prefilled with sterile water.
■ Tube holder, tape, or leg strap.
■ Urine collection bag with drainage tubing attached (the tubing may also be attached to the catheter).

Assessment
■ Assess the cognitive level to determine whether the patient will be able to follow instructions.
■ Assess:
■ Conditions that may impair the patient’s ability to assume the necessary position.
■ For signs and symptoms of bladder infection (e.g., elevated temperature, urinary frequency, dysuria).
■ Degree of bladder distention (to establish a baseline).
■ General size of the urinary meatus.
■ Determine time of last voiding or last catheterization; allergy to iodine (if that is the antiseptic solution in the kit); and allergy to latex.
■ Be Safe! Note conditions (e.g., enlarged prostate in men) that may make it difficult to pass the catheter.
■ Be Smart! Assess the need for extra lighting.

Post-Procedure Reassessment
■ Note:
■ Any difficulty with catheter insertion.
■ Characteristics of the urine obtained (e.g., amount, color, odor, presence of sediment or mucus).
■ Any bladder distention.
■ Be Smart! Some facilities have a bladder-scanning device that will allow you to determine whether residual urine remains.
■ Monitor to see that drainage is not obstructed and that the drainage bag is below the level of the bladder.

Key Points
■ Be Smart! Allow adequate time for this procedure: Experienced nurses need at least 15 minutes. You will need more time if problems arise—and even more time if you are a novice.
■ Be Smart! Take an extra pair of sterile gloves and an extra sterile catheter.
■ Be sure to have good lighting.
■ Work on the right side of the bed if you are right-handed; and on the left side if you are left-handed.
■ Drape the patient for privacy.
■ Perform perineal care before the procedure.
■ Don sterile gloves and maintain sterile technique while manipulating the supplies in the kit and performing the procedure.
■ Be Safe! Use a different solution for cleansing the perineum if the patient is allergic to iodine.
■ Be Safe! For indwelling catheterization, pretesting the balloon by inflating it before insertion is not necessary, especially with silicone catheters, because the practice can cause the balloon to form cuffs. Cuffing can cause harm to the patient’s urethra.
■ Lubricate the catheter tip before insertion.
■ Insert the catheter 5 to 7.5 cm (2 to 3 in.) for women, 17 to 22.5 cm (7 to 9 in.) for men, until urine flows use the smallest size catheter possible.
■ Be Smart! Once you have touched the patient’s perineum with your nondominant hand, do not remove that hand from the patient.
■ Drain the bladder; collect needed samples; measure urine; and connect the drainage bag.

Documentation
■ Record:
■ Time and date of the procedure.
■ Size of catheter used.
■ Amount of urine obtained (on the I&O portion of the graphics sheet).
■ Color of urine.
■ Odor, presence of mucus and blood (in the nursing notes).
■ Patient’s subjective statements.
■ Time a specimen was collected and sent to the lab.
■ Some facilities require that you record the amount of saline used to inflate the balloon.

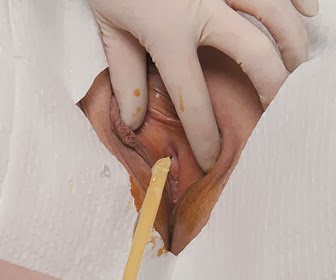
Draping a patient for privacy
Cleansing the urinary meatus, through a fenestrated drape
Inserting the urinary catheter
Read More

Obtaining a Sterile Urine Specimen From a Catheter

Obtaining a Sterile Urine Specimen From a Catheter

Equipment
■ Clean gloves.
■ Antiseptic swab.
■ Sterile specimen container with a lid.
■ Specimen identification label.
■ A 5- to 10-mL sterile syringe with a sterile 21- to 25-gauge needleless access device.

Assessment
■ Assess patency of the catheter (e.g., kinks). Post-Procedure Reassessment
■ Observe for unusual characteristics of the urine (e.g., color, odor, clarity, crystals, blood, mucus).
■ Note any difficulties with urination (e.g., pain, burning, dribbling, difficulty beginning).

Key Points
■ Empty the drainage tube of urine.
■ Be Smart! If the client’s urine is not flowing briskly, clamp the drainage tube below the level of the specimen port for 15 to 30 minutes to allow a fresh sample to collect.
■ Don clean gloves; swab the specimen port with an antiseptic swab.
■ Insert the needleless access device with a 20- or 30-mL syringe into the specimen port; aspirate the amount of urine you need.
■ Transfer the specimen into a sterile specimen container and cap it tightly.
■ Remove the clamp from the catheter and from the tubing of the urinary collection bag.
■ Label and package the specimen according to agency policy.
■ Transport the specimen to the lab. If immediate transport is not possible, refrigerate the sample.
■ Be Safe! Never disconnect the catheter from the drainage tube to obtain a sample. Interrupting the system creates a portal of entry for pathogens, thereby increasing the risk of contamination.

Documentation
■ Chart urine volume in the patient record, per agency protocol, including the time and date that the specimen was collected.
■ Record the characteristics of the urine: color, odor, particulate matter, blood, clarity, or other qualities; and any difficulty with voiding, including pain or burning with urination, frequency, or difficulty starting the urine flow.
■ You may also need to record urine output on the I&O record.

Obtaining a sterile urine specimen from a catheter
Read More