7/7/14

Pulse Oximeters

Pulse Oximeters

Finding
Intervention
SpO2 >95%
Considered normal and requires no intervention.
Continue routine monitoring of Pt.
SpO2 91%–94%
Considered acceptable.
Assess probe placement and adjust if necessary.
Continue to monitor Pt.
SpO2 85%–90%
Raise HOB and stimulate Pt to breathe deeply.
Assess airway and encourage coughing
Suction airway if needed.
Administer oxygen and titrate to SpO2 >90%.
Notify physician and RT if SpO2 fails to improve after
a few minutes.
SpO2 <85%
Administer 100% oxygen, position Pt to facilitate
breathing, suction airway if needed, and notify
physician and RT immediately.
Check medication record and consider naloxone or
flumazenil for medication-induced respiratory
depression.
Be prepared to manually ventilate or aid in intubation
if condition worsens or fails to improve.

Caution: 
Consider readings within overall context of Pt’s medical history and physical exam. Reliability of pulse oximeters is sometimes questionable, and many conditions can produce false readings. Assess Pt’s skin signs, RR, and HR. Ask how Pt is feeling. Repositioning probe to a different location (ears, toes, or
different finger) may help correct suspected false reading. Note: readings > 90% may be considered normal to acceptable in Pts who normally live at higher altitudes.

Conditions That May Produce False Readings
Alkalosis . . . . . . . . . . . . . . . . . . . . . . . . . . . . . . false high
Anemia . . . . . . . . . . . . . . . . . . . . . . . . . . . . . . . false high
Carbon monoxide (CO) poisoning . . . . . . . . . . false high
Hypovolemia . . . . . . . . . . . . . . . . . . . . . . . . . . false high
Pt movement . . . . . . . . . . . . . . . . . . . . . . . . . . erratic readings
Cool extremities . . . . . . . . . . . . . . . . . . . . . . . . false low
Dark pigment . . . . . . . . . . . . . . . . . . . . . . . . . . false low
Nail polish or nail infections . . . . . . . . . . . . . . false low
Medication (peripheral vasoconstrictors) . . . . false low
Poor peripheral circulation . . . . . . . . . . . . . . . false low
Raynaud’s disease . . . . . . . . . . . . . . . . . . . . . . false low
Read More

3/2/14

Steam Inhalation

Definition: It is the intake of steam alone or with medication through the nose or mouth Purpose

1. In order to produce a local effect on the upper respiratory passage during cold, sinusitis, laryngitis, bronchitis etc. common drugs used are frier balsam (tincture of benzoin compound, eucalyptus. Menthol, camphor)

2. To allay spasm e.g. Asthma, angina pectoris

3. To increase circulation in the lungs by increasing or decreasing the secretion of the bronchi. E.g. ammonia inhaled in cases of fainting and syncope stimulated the respiratory center and heart action.

4. To moisten secretions e.g. Tracheotomy
Read More

Precautions to be taken when Oxygen is used

1. Oxygen supports combustion. There fore it is essential for the patient's safety their is no smoking within 3 meters of oxygen equipment. Lighted matches, cigarettes, electric lights, nylon clothing, electric pads, bells mechanical toys should be forbidden.

2. Alcohol must not be applied to the pt's skin

3 The catheter tip and the cylinder itself must not be lubricated with Vaseline or oil or any kind

4. Cylinders must be handled carefully as the oxygen is under pressure.

5. The fine adjustment should always be closed when the main tap is turned on.

6. Check that there is no obstacle in the pt's airway before firing oxygen in order to prevent pt. From suffocation.

7. A rate of 2-liters/ minute is commonly used when oxygen used in case of emergency instead of free air. In the case of asphyxia liter/min may be needed. Protect patient from asphyxia, inspecting regularly pressure gauge and flow meter and noting pulse, respiration, color, mental state and necrosis from carbon dioxide.
Read More

Oxygen tent Procedure

Purpose:
a) To keep patient in high oxygenation environment.
b) Whenever the other means are not possible.

Equipment
1. Transparent oxygen tent and its apparatus fitted with oxygen
2. Ice if the apparatus is with out refrigerator device.
3. Hanger for the tent
4. Room thermometer if needed
5. No smoking sign for the unit

Procedure
1. Remove all electrical appliances from the room as this may produce sparks.
2. Post sign of no smoking on many places in the unit
3. Prepare and check if the applicator is working properly.
4. Bring the oxygen unit to the bedside and fix the tent on the hanger.
5. Close all appliances of the tent: place ice if the apparatus is without refrigeration device.
6. Tuck the side of the hold of tent under the mattress as far as they will go.
7. Fill the tent with 12-15 liters of oxygen 40-60% concentration for the first half hour.
8. After the first half hour regulate the flow of oxygen to 6-10 liters or as ordered by the doctor until the treatment is completed.
9. Check temperature indicator frequently and adjust to 180C- 220C.
10. Record state of patient and time started and the flow of the oxygen.
Read More

12/31/13

Setting up Disposable Chest Drainage Systems

Setting up Disposable Chest Drainage Systems

Equipment
■ 2 disposable chest drainage units (CDU).
■ Chest tube insertion kit (common tube size for adults is 36 Fr; kit should contain povidone-iodine, local anesthetic, syringe, needles, drapes, scalpel, suture).
■ 5-in-1 or Y-connector for two chest tubes, if not contained in insertion kit.
■ 2 rubber-tipped hemostats.
■ Sterile gloves, masks, and sterile gowns.
■ Sterile 4 in. 4 in. gauze dressings.
■ Sterile, precut drain dressings.
■ Petroleum-based gauze dressings.
■ Large drainage dressings (e.g., ABD).
■ 2-in. silk tape.
■ 1-in. silk tape or nylon banding system for securing tube connections.
■ For a water-seal system, you also need sterile water.

Assessment
■ Ensure that the patient has venous access.
■ Assess:
■ VS.
■ Level of consciousness, orientation, responsiveness, anxiety, and restlessness.
■ Patient’s knowledge of chest tube therapy.
■ Cardiac and respiratory status, including rate, depth, and rhythm.
■ Breath sounds.
■ Skin color.
■ Pulse oximetry.
■ ABG results.

Post-Procedure Reassessment
■ Evaluate the patient’s tolerance to the chest tube insertion.
■ Determine whether the patient’s respiratory status has changed after tube insertion.
■ Auscultate breath sounds every 2 hours.
■ Check type, color, and amount of chest drainage every 15 minutes for the first 2 hours, and then check as prescribed (at least every 4 hours).
■ Assess for crepitus and drainage around the chest tube insertion site.
■ Check the disposable chest drainage system for air leaks.
■ Monitor I&O every 8 hours.
■ Check laboratory values to evaluate blood loss and oxygenation.

Key Points
■ Obtain and prepare the prescribed drainage system.
■ Position the patient according to the indicated insertion site.
■ Open the chest tube insertion tray and set up the sterile field.
■ Don mask, gown, and sterile gloves and organize the supplies you will need for dressing the insertion site.
■ As soon as the chest tube is inserted, attach it to the drainage system.
■ Turn on the wall (or other) suction source (usually –80 mm H2O).
■ Set the prescribed CDU suction level (usually –20 cm H2O).
■ After the clinician sutures the chest tube in place, don a clean pair of sterile gloves.
■ Be Safe! Using sterile technique, wrap petroleum gauze around the chest tube at the insertion site, and dress the site with two precut sterile drain dressings covered by a large drainage dressing (e.g., ABD).
■ Be Safe! Apply an occlusive dressing over the insertion site (e.g., with 2-inch silk tape); cover the dressing completely. Date, time, and initial the dressing.
■ Be Safe! Using the spiral taping technique, wrap 1-inch silk tape around the connections. Wrap from top to bottom and bottom to top. (Or use locking connections, if furnished with the CDU).
■ With an 8-inch-long piece of 2-inch tape, secure the top end of the drainage tube to the chest tube dressing.
■ Make sure the tubing lies with no kinks and no dependent areas, in a straight line to the CDU.
■ Prepare the patient for a portable chest x-ray exam.
■ Be Safe! Keep emergency supplies at the bedside in the event of tube dislodgement or system failure (2 rubber-tipped clamps, petroleum gauze dressing, and spare disposable CDU).
■ Be Safe! Maintain the chest tube and drainage system by preventing kinks, ensuring patency of the air vent, and keeping the system below the level of the chest tube.
■ Be Safe! Keep the head of the bed always elevated to at least 30°.

Documentation
■ Document:
■ Assessment findings before, during, and after chest tube insertion (e.g., VS, breath sounds, cardiac status, pulse oximetry).
■ Date and time of the chest tube insertion.
■ Name of the clinician who performed the procedure.
■ Location of the insertion site, size of the chest tube, type of drainage system, and amount of suction applied, if any.
■ Any medications the patient received during the procedure.
■ Color and amount of drainage.
■ Patient’s tolerance to the procedure.
■ Presence of subcutaneous emphysema or air leak, if any.
■ Complications and any interventions preformed as a result of the complications.
■ Chest x-ray findings.
■ Record chest tube output on the I&O portion of the flowsheet (in most agencies).

CDU set up and in place
Precut drain dressing
Spiral taping the connector
Read More

Caring for Patients Requiring Mechanical Ventilation

Caring for Patients Requiring Mechanical Ventilation

Equipment
■ 2 oxygen sources.
■ Air source that provides 50 psi.
■ Mechanical ventilator.
■ Resuscitation bag with oxygen connection tubing.
■ Humidification device.
■ Ventilator tubing, connectors, and adaptors.
■ Condensation collection device.
■ Pulse oximetry device.
■ Procedure gloves, protective gown, and eye covering.
■ Sterile gloves and suction equipment, if you will perform suctioning.
■ Suction equipment.
■ Sterile water for the humidifier.
■ Inline thermometer.

Assessment
■ Review the health record to make sure that mechanical ventilation is included in the options outlined in the patient’s advance directive.
■ Assess the patient’s understanding of mechanical ventilation therapy, if possible.
■ Assess:
■ Respiratory status, including rate, depth, and rhythm.
■ Breath sounds.
■ Color.
■ Pulse oximetry results.
■ Be Smart! Blood may be drawn for a baseline ABG analysis.

Post-Procedure Reassessment
■ After mechanical ventilation is instituted, assess for chest expansion and auscultate bilateral breath sounds.
■ Auscultate breath sounds every 2 to 4 hours, according to agency policy. Evaluate the patient’s tolerance of mechanical ventilation.
■ Verify adequate ventilation and that the patient is breathing in synchrony with the ventilator.
■ Be Safe! Check ABGs and respiratory status about 30 minutes after setup.
■ Monitor continuous pulse oximetry, capnography, and ABGs.
■ Be Smart! When monitoring VS, count spontaneous breaths as well as those delivered by the ventilator.

Key Points
Initial Ventilator Setup
■ Prepare the resuscitation bag; keep it at the bedside.
■ Respiratory therapists are responsible for setting up mechanical ventilation in most agencies. If you must assume the responsibility, refer to the manufacturer’s instructions.
■ Plug in the ventilator and verify settings with the medical prescription.
■ Be Safe! Make sure the ventilator alarm limits are set appropriately.
■ Fill the humidifier with sterile distilled water.
■ Attach the ventilator tubing to the endotracheal tube or tracheostomy tube; secure the ventilator tubing.
■ Attach a capnography device, if available.
■ Prepare the inline suctioning equipment (see Procedure 35-8).

After the Initial Ventilator Setup
■ Wear gloves, protective eye covering, and gown.
■ Check respiratory status and ABGs again about 30 minutes after setup.
■ Be alert for changes in ventilator settings and the patient’s compromised respiratory status.
■ Maintain the patient in a semirecumbent position (head of bed at 30° to 45°).
■ Check the ventilator tubing frequently for condensation.
■ Drain the condensate into a collection device, or briefly disconnect the patient from the ventilator and empty the tubing into a waste receptacle, according to agency policy.
■ Be Safe! Never drain the condensate into the humidifier.
■ Check ventilator and humidifier settings regularly.
■ Check the inline thermometer regularly.
■ Provide alternate form of communication (e.g., letter board, texting using a cell phone or keyboard).
■ Reposition the patient regularly (every 1 to 2 hours), being careful not to pull on the ventilator tubing.
■ Moisten the lips with a cool, damp cloth and water-based lubricant.
■ Provide regular oral care: brush teeth twice a day with a soft toothbrush, moisturize oral mucosa and lips every 2 to 4 hours, use mouthwash twice a day for adult patients.
■ Use a 0.12% CHG rinse twice a day for adult patients who have undergone cardiac surgery.
■ Be Smart! This regimen may help prevent VAP.
■ Ensure that the call light is always within reach, and answer call light and ventilator alarms promptly.
■ Monitor the tracheostomy tube for proper cuff inflation.
■ Monitor for gastric distention.
■ Give sedatives or antianxiety drugs as needed.

Documentation
■ Note:
■ Date and time mechanical ventilation was initiated.
■ Type of ventilator and the prescribed settings used.
■ Patient’s response to mechanical ventilation, including:
• VS.
• Breath sounds.
• Ease of breathing.
• Pulse oximetry.
• I&O.
• Skin color.
• ABG and chest x-ray results.
Preparing the resuscitation bag
Verify ventilator settings
Drain tubing into a waste receptacle, never into the humidifier
Read More

Performing Upper Airway Suctioning

Performing Upper Airway Suctioning

Equipment
■ Portable or wall suction device with connection tubing and a collection canister.
■ Linen-saver pad or towel.
■ Yankauer device (can be used for oropharyngeal suction).
■ Pour-bottle of sterile normal saline solution.
■ Sterile basin or other container for fluids.
■ Face shield or goggles and gown.
■ Procedure gloves.
■ Water-soluble lubricant for nasopharyngeal suctioning.
■ Sputum trap, if a specimen is needed.
■ Biohazard bag.
■ Sterile suction catheter kit (12 to 18 Fr for adults, 8 to 10 Fr for children, and 5 to 8 Fr for infants).
■ If a kit isn’t available, collect the following: sterile suction catheter of the appropriate size, and a sterile container.
■ If you plan to suction both the oropharynx and the nasopharynx, you need a separate sterile catheter for each.

Assessment
■ Assess:
■ Respiratory status, including respiratory rate, depth, and rhythm.
■ Breath sounds.
■ Color.
■ Pulse oximetry results.
■ Note signs that indicate the need for suctioning:
■ Restlessness.
■ Cyanosis.
■ Labored respirations.
■ Decreased oxygen saturation.
■ Increased heart and respiratory rates.
■ Visible secretions in the airway.
■ Presence of adventitious breath sounds during auscultation.
■ Be Safe! You must be certain the patient requires suctioning. Suctioning should be performed only when necessary to prevent unnecessary oxygen desaturation and tissue trauma.

Post-Procedure Reassessment
■ Assess the color, consistency, and amount of secretions.
■ Evaluate the patient’s tolerance of the procedure.
■ Note whether there were signs of respiratory distress during the procedure.
■ Evaluate the effectiveness of the procedure by comparing breath sounds, VS, and pulse oximetry before and after the procedure.

Key Points
■ Position the patient in semi-Fowler’s position.
■ Oropharyngeal: Patient’s face turned toward you.
■ Nasopharyngeal: Neck hyperextended.
■ Adjust the suction regulator according to agency policy (typically 100 to 120 mm Hg for adults, 95 to 110 mm Hg for children, and 50 to 95 mm Hg for infants).
■ If using the nasal approach, open the water-soluble lubricant.
■ Don procedure gloves.
■ Using your dominant hand, attach the suction catheter to the connection tubing.
■ Approximate the depth the suction catheter should be inserted.
■ Remove the oxygen delivery device, if necessary.
■ If the oxygen saturation is less than 94%, or if patient is in distress, administer supplemental oxygen before, during, and after suctioning.
■ Lubricate and insert the suction catheter.
■ Gently advance the catheter the premeasured distance into the pharynx.
■ Engage the suction and apply it while you withdraw the catheter, using a continuous rotating motion.
■ Clear the catheter with sterile saline.
■ Lubricate the catheter, and repeat suctioning as needed, allowing 20-second intervals between suctioning.
■ Be Smart! Upper airway suctioning may be done via the oropharyngeal or nasopharyngeal route. However, nasal suction is usually required to improve oxygenation only in infants because most adult airway obstruction occurs in the mouth and oropharynx.
■ Be Safe! Vigorous nasal suction can induce epistaxis (nosebleed) and further complicate an already difficult airway.

Documentation
■ Record:
■ Date, time, and reason you performed suctioning.
■ Suction technique you used.
■ Catheter size.
■ Note:
■ Color, consistency, and odor of secretions.
■ Patient’s respiratory status before and after the procedure.
■ Patient’s tolerance of the procedure.
■ Any complications that occurred as a result of the procedure.
■ Resulting interventions.

Oropharyngeal suctioning
Nasopharyngeal suctioning
Read More

Performing Tracheostomy or Endotracheal Suctioning (Inline System)

Performing Tracheostomy or Endotracheal Suctioning (Inline System)

Equipment
■ For the once-a-day steps: procedure gloves; inline suction catheter.
■ When suctioning: sterile normal saline.
■ Be Smart! Inline suction is used only with a mechanical ventilator.
■ Linen-saver pad.

Assessment
■ Assess respiratory status (i.e., respiratory rate, depth, and rhythm; breath sounds; color; and pulse oximetry results).
■ Assess for signs that indicate the need for suctioning:
■ Restlessness.
■ Cyanosis.
■ Labored respirations.
■ Decreased oxygen saturation.
■ Increased heart and respiratory rates.
■ Visible secretions in the airway.
■ Presence of adventitious breath sounds during auscultation.

Post-Procedure Reassessment
■ Assess color, amount, and consistency of secretions.
■ Evaluate the patient’s tolerance of the procedure; note signs of
respiratory distress during and after the procedure.
■ Compare breath sounds, VS, and pulse oximetry before and after suctioning.

Key Points
Daily Procedure Steps
■ Prepare the equipment.
■ Open the inline suction catheter package, maintaining sterility.
■ Remove the adapter on the ventilator tubing and attach the suction catheter equipment to the ventilator tubing.
■ Reconnect the adapter on the ventilator tubing.
■ Attach the other end of the inline catheter to the connection tubing going to suction. Suction Procedure Steps
■ Assist the patient to semi-Fowler’s position unless contraindicated.
■ Don clean gloves and place a linen-saver pad on the patient’s chest.
■ Unlock the suction control port.
■ Adjust suction regulator according to guidelines or agency policy.
■ Hyperoxygenate the patient according to agency policy.
■ Unlock the inline catheter; with your dominant hand, insert the suction catheter gently, with suction off. Ask the patient to take slow, deep breaths if she can cooperate.
■ Be Safe! Do not apply suction as you enter or advance into the airway.
■ Be Safe! Advance the suction catheter gently, aiming downward, no further than the carina tracheae (premeasure). Do not force the catheter.
■ Apply continuous suction as you withdraw the catheter, but for no longer than 15 seconds.
■ Avoid saline lavage during suctioning.
■ Be Safe! Repeat suctioning as needed, allowing intervals of at least 30 seconds between suctioning. Make sure to hyperoxygenate the patient between each pass.
■ Withdraw the suction catheter completely into the sleeve, until you see the indicator line.
■ Use normal saline to clear secretions from the catheter. Attach the prefilled, 10-mL container of saline to the saline port on the inline equipment; squeeze the container while applying suction.
■ Lock the suction regulator port.
■ Provide mouth care and reposition the patient.

Documentation
■ Record:
■ Date, time, and reason for suctioning.
■ Size of suction catheter.
■ Amount, color, consistency, and odor of secretions.
■ Respiratory status before and after suctioning.
■ Patient’s tolerance of the procedure.
■ Any complications as a result of the procedure, and interventions performed in response.

Insert into the airway by maneuvering the catheter within the sterilesleeve
Read More

Performing Tracheostomy Care Using Modified Sterile Technique

Performing Tracheostomy Care Using Modified Sterile Technique

Equipment
■ Tracheostomy suction equipment.
■ Tracheostomy care kit or the following sterile supplies:
■ Several cotton-tipped applicators, 2 basins, a brush, sterile 4 in. x 4 in. gauze pads, sterile precut tracheostomy dressing.
■ 2 pairs of procedure gloves.
■ Disposable inner cannula that is the same size as the tracheostomy, if available.
■ Normal saline solution or tap water if agency policy allows.
■ Roll of twill tape or hook-and-loop fastener (Velcro) tracheostomy holder.
■ Bandage scissors.
■ Towel or linen-saver pad.
■ Overbed table.
■ Face shield.
■ Protective gown.
■ Mild soap and 2 clean washcloths.
■ For reusable inner cannula only: hydrogen peroxide.

Assessment
■ Assess respiratory status (i.e., rate, depth, and rhythm; breath sounds; color; and pulse oximetry results).
■ Assess the tracheostomy site for drainage, redness, or swelling.
■ Be Safe! Determine when the patient last ate. Schedule this procedure at least 3 hours after a meal to decrease risk of aspiration.

Post-Procedure Reassessment
■ Assess the area around the stoma site for skin breakdown.
■ Evaluate the patient’s tolerance of the procedure and any signs of respiratory distress.

Key Points
■ Position the patient in semi-Fowler’s position.
■ Don gown, eye protection, and gloves.
■ Suction the tracheostomy.
■ Remove soiled dressing; remove gloves; wash hands.
■ Set up the sterile field and prepare equipment, keeping supplies sterile.
■ Don clean procedure gloves.
■ Remove the oxygen source if the patient is receiving oxygen, offer oxygen blow-by, and attach to the outer cannula. If that is not possible, clean and return the inner cannula before proceeding.
■ Remove the inner cannula with your nondominant hand. If the cannula is disposable, discard it; if the cannula is reusable, clean it.
■ Clean the stoma under the faceplate with the cotton-tipped applicators saturated with normal saline solution or tap water.
■ Clean the top surface of the faceplate and the skin around it with the saline or water-soaked gauze pads, or with a washcloth and tap water. Dry the skin with dry sterile gauze.
■ Be Safe! With the help of an assistant, remove soiled tracheostomy ties/stabilizer. If you must change ties without help, always place the new tape before cutting the soiled tape or holder.
■ Ask the patient to flex his neck, and with an assistant stabilizing the tracheostomy tube, apply new tracheostomy ties.
■ Insert a precut, sterile tracheostomy dressing under the faceplate and new ties.
■ Be Safe! Use only sterile, precut dressing. Or open and refold a 4 in. x 4 in. gauze pad into a V shape. Do not cut 4 in. 4 in. gauze, and do not use cotton-filled gauze squares.

Documentation
■ Document date and time of the tracheostomy care.
■ Note:
■ Color, amount, consistency, and odor of secretions.
■ Condition of the stoma and skin around the stoma site (presence of drainage, redness, or swelling).
■ Record:
■ Respiratory status, including rate, depth, and pattern.
■ Skin color.
■ Breath sounds.
■ Note the patient’s tolerance of the procedure.
■ Document any interventions that were needed.

Disposable tracheostomy equipment
An unfolded and refolded gauze dressing
Read More

Administering Oxygen

Procedure of Administering Oxygen

Equipment
■ Oxygen source.
■ Flow meter.
■ Oxygen tubing.
■ Nasal cannula, oxygen mask, or face tent.
■ Prefilled humidification device.

Assessment
■ Assess patient’s understanding of oxygen therapy.
■ Assess:
■ Respiratory status, including rate, depth, and rhythm.
■ Breath sounds.
■ Color.
■ Capillary refill and pulse oximetry results.
■ Assess nares for patency (if a nasal cannula is being used) and behind the ears for signs of skin breakdown.

Post-Procedure Reassessment
■ Assess respiratory rate, depth, and effort.
■ Auscultate breath sounds before leaving the bedside, then monitor
every 2 to 4 hours, and as indicated.
■ Monitor pulse oximetry until respiratory status improves.
■ Monitor ABG results if prescribed.
■ Evaluate for skin breakdown, especially areas behind the ears, cheekbones, and under the chin—areas that are in contact with the oxygen delivery system.

Key Points
■ Attach the flow meter to the oxygen source. Attach a humidifier to the flow meter, as needed.
■ Assemble and apply the oxygen equipment according to the device prescribed (nasal cannula, face mask, or face tent).
■ Attach the delivery device to the humidifier or the adapter, then put it on the patient:
■ Nasal cannula: Nose prongs should curve downward; loop the tubing around each ear; use the slide device to tighten the cannula under the chin.
■ Face mask: Secure the elastic band around the back of the head.
■ Face tent: Secure like face mask; be sure it fits under the chin.
■ Turn on the oxygen using the flow meter, and adjust according to the prescribed flow rate.
■ Double check that the oxygen equipment is set up correctly and functioning properly.
■ Be Safe! Assess the patient’s respiratory status before you leave the bedside.

Documentation
■ Document:
■ Date, time, and reason oxygen therapy was initiated.
■ Type of oxygen delivery system used.
■ Amount of oxygen administered.
■ Patient’s response to oxygen therapy.
■ Record:
■ VS.
■ Pulse oximetry values.
■ Breath sounds.
■ Skin color.
■ Respiratory effort.

Nasal cannula
Face mask
Face tent
Read More

Monitoring Pulse Oximetry (Arterial Oxygen Saturation)

Monitoring Pulse Oximetry (Arterial Oxygen Saturation)

Equipment
■ Nail polish remover, if necessary.
■ Oximeter.
■ Oximeter probe sensor appropriate for patient age, size, weight, and for the desired location.

Assessment
■ Check patient history for allergy to adhesive.
■ Assess the patient’s need for SaO2 monitoring:
■ Risk factors, such as heart or pulmonary disease.
■ Low hemoglobin level.
■ Confusion, decreased level of consciousness.
■ Respiratory distress.
■ Assess the patient’s:
■ Respiratory status, including breath sounds.
■ Respiratory rate, depth, and pattern.
■ Tissue perfusion.
■ Skin and nailbed color.
■ Determine the optimal location for the oximeter probe sensor (e.g., the fingertip, earlobe, forehead, or bridge of the nose).
■ Check capillary refill and pulse at the pulse closest to the site.
■ Assess for factors that may interfere with pulse oximetry measurement, such as hypotension, hypothermia, and tremors.
■ Be Smart! To ensure accurate monitoring, choose a site that has adequate circulation, is free of artificial nails, and contains no moisture.
■ Be Smart! Use a nasal sensor if peripheral circulation is compromised.

Post-Procedure Reassessment
■ Evaluate the patient’s understanding of the procedure and the obtained values.
■ Compare pulse oximetry results with the patient’s clinical presentation.
■ Evaluate the effectiveness of therapy by comparing SaO2 results before, during, and after treatment.
■ Monitor skin integrity at the site every 4 hours if you are using an adhesive probe sensor or every 2 hours if you are using a clip-on probe sensor.

Key Points
■ Choose a sensor that is appropriate for the patient’s age, size, and weight and for the desired location.
■ Cleanse and dry the site. Remove nail polish, as needed.
■ Attach the probe sensor to the site. Photodetector and light-emitting diodes on the probe sensor should face each other.
■ Connect the sensor probe to the oximeter, and turn it on.
■ Check that the pulse rate on the oximeter corresponds with the patient’s radial pulse.
■ Read the SaO2 measurement on the digital display when it reaches a constant value (usually in 10 to 30 seconds).
■ Set and turn on the alarm limits for SaO2 and pulse rate, according to the manufacturer’s instructions, patient condition, and agency policy if continuous monitoring is necessary.
■ Be Smart! Patients with underlying pulmonary disease may be accustomed to low oxygen saturation levels, so you may need to adjust the lower limit alarm.
■ Be Safe! Rotate the site if monitoring is continuous.
■ When monitoring is no longer needed, remove the probe sensor, and turn off the oximeter.

Documentation
■ Most agencies use a flowsheet if frequent monitoring is necessary.
■ Record the date and time of each pulse oximetry reading obtained; state whether readings are intermittent or continuous.
■ If readings are continuous, record alarm parameters.
■ Chart the patient’s vital signs and SaO2 results, and indicate whether the patient is breathing room air or receiving oxygen therapy.
■ If the patient is receiving oxygen therapy, note the oxygen concentration and the mode of delivery.
■ Document acute decreases in SaO2, any precipitating factors, treatment interventions, and the patient’s response.

Pulse oximetry using a finger probe
Read More

Collecting an Expectorated Sputum Specimen

Collecting an Expectorated Sputum Specimen

Equipment
■ Sterile specimen container with lid.
■ Procedure gloves.
■ Glass of water.
■ Emesis basin.
■ Tissues.
■ Linen-saver pad.
■ Pillow (if abdominal or chest incision is present).
■ Patient identification label.
■ Completed laboratory requisition form.
■ Small plastic bag (or agency-designated container) with a biohazard label for delivering the specimen to the laboratory.

Assessment
■ Assess:
■ Comprehension of the procedure.
■ Ability to deep-breathe, cough, and expectorate.
■ Respiratory status (breath sounds; respiratory rate, depth, and pattern; skin and nailbed color; and tissue perfusion).
■ Be Smart! You may need to delay sputum collection if the patient is in respiratory distress.

Post-Procedure Reassessment
■ Evaluate the patient’s respiratory status during and after the procedure.
■ Examine the color, consistency, and odor of the sputum specimen.
■ Evaluate the patient’s understanding of the procedure and test results.
■ Promptly report laboratory results to the primary care provider.

Key Points
■ Use high- or semi-Fowler’s position.
■ Drape a linen-saver pad over the patient’s chest.
■ Instruct the patient to rinse his mouth and gargle with water.
■ Caution the patient not to touch the inside of the sterile container or lid.
■ Instruct the patient to breathe deeply for 3 or 4 breaths, hold his breath, and then cough and expectorate into the container.
■ Repeat until an adequate sample is obtained (typically 5 to 10 mL).
■ Label the specimen container with patient’s name, test name, and collection date and time.
■ Place the specimen in a plastic bag with a biohazard label. Follow agency policy.
■ Send the specimen to the laboratory immediately.
■ If specimen transport is delayed, consult the lab; refrigeration may be required.

Documentation
■ Record the date and time the specimen was collected, the method of collection, and the type of specimen ordered.
■ Note the amount, color, consistency, and odor of the specimen.
■ Document the patient’s tolerance of the procedure.

Ask the patient to rinse her mouth and gargle
Read More

12/20/13

Using an Oxygen Tent

Goal: The patient exhibits an oxygen saturation level within acceptable parameters.

1. Bring necessary equipment to the bedside stand or overbed table.

2. Perform hand hygiene and put on PPE, if indicated.

3. Identify the patient.

4. Close curtains around bed and close the door to the room, if possible.

5. Explain what you are going to do and the reason for doing it to the patient and parents/guardians. Review safety precautions necessary when oxygen is in use.

6. Calibrate the oxygen analyzer according to manufacturer’s directions.

7. Place tent over crib or bed. Connect the humidifier to the oxygen source in the wall and connect the tent tubing to the humidifier. Adjust flow rate as ordered by physician. Check that oxygen is flowing into tent.

8. Turn analyzer on. Place oxygen analyzer probe in tent, out of patient’s reach.

9. Adjust oxygen as necessary, based on sensor readings. Once oxygen levels reach the prescribed amount, place patient in the tent.

10. Roll small blankets like a jelly roll and tuck tent edges under blanket rolls, as necessary.

11. Encourage patient and family members to keep tent flap closed.

12. Reassess patient’s respiratory status, including respiratory rate, effort, and lung sounds. Note any signs of respiratory distress, such as tachypnea, nasal flaring, use of accessory muscles, grunting, retractions, or dyspnea.

13. Remove PPE, if used. Perform hand hygiene.

14. Frequently check bedding and patient’s pajamas for moisture. Change as needed to keep the patient dry.
Read More

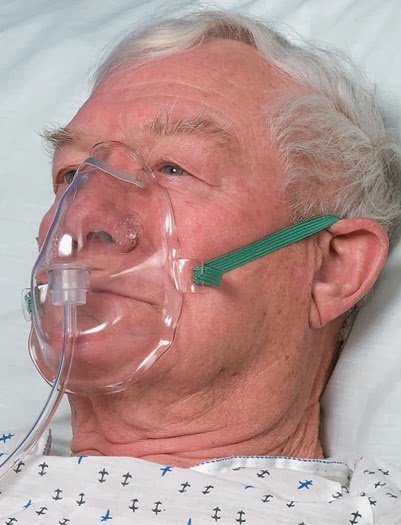
Administering Oxygen by Mask

Goal: The patient exhibits an oxygen saturation level within acceptable parameters.

1. Bring necessary equipment to the bedside stand or overbed table.

2. Perform hand hygiene and put on PPE, if indicated.

3. Identify the patient.

4. Close curtains around bed and close the door to the room, if possible.

5. Explain what you are going to do and the reason for doing it to the patient. Review safety precautions necessary when oxygen is in use. Place “No Smoking” signs in appropriate areas.

6. Attach face mask to oxygen source (with humidification, if appropriate, for the specific mask). Start the flow of oxygen at the specified rate. For a mask with a reservoir, be sure to allow oxygen to fill the bag before proceeding to the next step.

7. Position face mask over the patient’s nose and mouth. Adjust the elastic strap so that the mask fits snugly but comfortably on the face. Adjust the flow rate to the
prescribed rate.

8. If the patient reports irritation or redness is noted, use gauze pads under the elastic strap at pressure points to reduce irritation to ears and scalp.

9. Reassess patient’s respiratory status, including respiratory rate, effort, and lung sounds. Note any signs of respiratory distress, such as tachypnea, nasal flaring, use of accessory muscles, or dyspnea.

10. Remove PPE, if used. Perform hand hygiene.

11. Remove the mask and dry the skin every 2 to 3 hours if the oxygen is running continuously. Do not use powder around the mask.
Read More

Administering Oxygen by Nasal Cannula

Goal: The patient exhibits an oxygen saturation level within acceptable parameters.

1. Bring necessary equipment to the bedside stand or overbed table.

2. Perform hand hygiene and put on PPE, if indicated.

3. Identify the patient.

4. Close curtains around bed and close the door to the room, if possible.

5. Explain what you are going to do and the reason for doing it to the patient. Review safety precautions necessary when oxygen is in use. Place “No Smoking” signs in appropriate areas.

6. Connect nasal cannula to oxygen setup with humidification, if one is in use. Adjust flow rate as ordered. Check that oxygen is flowing out of prongs.

7. Place prongs in patient’s nostrils. Place tubing over and behind each ear with adjuster comfortably under chin. Alternately, the tubing may be placed around the patient’s head, with the adjuster at the back or base of the head. Place gauze pads at ear beneath the tubing, as necessary.

8. Adjust the fit of the cannula, as necessary. Tubing should be snug but not tight against the skin.

9. Encourage patient to breathe through the nose, with the mouth closed.

10. Reassess patient’s respiratory status, including respiratory rate, effort, and lung sounds. Note any signs of respiratory distress, such as tachypnea, nasal flaring, use of accessory muscles, or dyspnea.

11. Remove PPE, if used. Perform hand hygiene.

12. Put on clean gloves. Remove and clean the cannula and assess nares at least every 8 hours, or according to agency recommendations. Check nares for evidence of irritation or bleeding.
Read More

Teaching Patient to Use an Incentive Spirometer

Goal: The patient accurately demonstrates the procedure for using the spirometer.

1. Review chart for any health problems that would affect the patient’s oxygenation status.

2. Bring necessary equipment to the bedside stand or overbed table.

3. Perform hand hygiene and put on PPE, if indicated.

4. Identify the patient.

5. Close curtains around bed and close the door to the room, if possible. Explain what you are going to do and why you are going to do it to the patient.

6. Assist patient to an upright or semi-Fowler’s position, if possible. Remove dentures if they fit poorly. Assess the patient’s level of pain. Administer pain medication, as prescribed, if needed. Wait the appropriate amount of time for the medication to take effect. If patient has recently undergone abdominal or chest surgery, place a pillow or folded blanket over a chest or abdominal incision for splinting.

7. Demonstrate how to steady the device with one hand and hold the mouthpiece with the other hand. If the patient cannot use hands, assist the patient with the incentive spirometer.

8. Instruct the patient to exhale normally and then place lips securely around the mouthpiece.

9. Instruct patient to inhale slowly and as deeply as possiblethrough the mouthpiece without using nose (if desired, a nose clip may be used).

10. When the patient cannot inhale anymore, the patient should hold his or her breath and count to three. Check position of gauge to determine progress and level attained. If patient begins to cough, splint an abdominal or chest incision.

11. Instruct the patient to remove lips from mouthpiece and exhale normally. If patient becomes light-headed during the process, tell him or her to stop and take a few normal breaths before resuming incentive spirometry.

12. Encourage patient to perform incentive spirometry 5 to 10 times every 1 to 2 hours, if possible.

13. Clean the mouthpiece with water and shake to dry. Remove PPE, if used. Perform hand hygiene.
Read More

Using a Pulse Oximeter

Goal: The patient exhibits arterial blood oxygen saturation within acceptable parameters, or greater than 95%.

1. Review chart for any health problems that would affect the patient’s oxygenation status.

2. Bring necessary equipment to the bedside stand or overbed table.

3. Perform hand hygiene and put on PPE, if indicated.

4. Identify the patient.

5. Close curtains around bed and close the door to the room, if possible. Explain what you are going to do and why you are going to do it to the patient.

6. Select an adequate site for application of the sensor.
a. Use the patient’s index, middle, or ring finger.
b. Check the proximal pulse and capillary refill at the pulse closest to the site.
c. If circulation at the site is inadequate, consider using the earlobe, forehead, or bridge of nose.
d. Use a toe only if lower extremity circulation is not compromised.

7. Select proper equipment:
a. If one finger is too large for the probe, use a smaller one. A pediatric probe may be used for a small adult.
b. Use probes appropriate for patient’s age and size.
c. Check if patient is allergic to adhesive. A nonadhesive finger clip or reflectance sensor is available.
8. Prepare the monitoring site. Cleanse the selected area with the alcohol wipe or disposable cleansing cloth. Allow the area to dry. If necessary, remove nail polish
and artificial nails after checking pulse oximeter’s manufacturer instructions.

9. Apply probe securely to skin. Make sure that the lightemitting sensor and the light-receiving sensor are aligned opposite each other (not necessary to check if placed on forehead or bridge of nose).

10. Connect the sensor probe to the pulse oximeter, turn the oximeter on, and check operation of the equipment (audible beep, fluctuation of bar of light or waveform on face of oximeter).

11. Set alarms on pulse oximeter. Check manufacturer’s alarm limits for high and low pulse rate settings.

12. Check oxygen saturation at regular intervals, as ordered by primary care provider, nursing assessment, and signaled by alarms. Monitor hemoglobin level.

13. Remove sensor on a regular basis and check for skin irritation or signs of pressure (every 2 hours for spring-tension sensor or every 4 hours for adhesive finger or toe sensor).

14. Clean nondisposable sensors according to the manufacturer’s directions. Remove PPE, if used. Perform hand hygiene.
Read More